Open Source Intelligence with Maltego
Maltego is a visual link analysis and data mining tool and it is the most famous software for performing Open Source Intelligence. It provides a library of plugins, called “transforms”, which are used to execute queries on open sources in order to gather information about a certain target and display them on a nice graph. In fact, differently from the command line tools seen until now, Maltego has a Graphical User Interface through which the user performs his research and analyzes results returned on the graph.
It is developed by Paterva which distributes three different versions: Maltego XL, Classic and CE. We are interested in Maltego CE which stands for Community Edition: this is the non commercial version and it is available for everyone after a quick registration.
Installation
Before proceeding with the installation it is a good idea to register at this link: https://www.paterva.com/web7/community/community.php. In fact, in order to use the software it is mandatory to have a Maltego account which is required at the startup of the application.
If you are using Kali Linux, Maltego CE is already installed. Moreover you will find that Kali has its own custom version called Maltego Chlorine, which has been made on purpose for this distro.
Otherwise you can download the package from https://www.paterva.com/web7/downloads.php#tab-3 and install it on your operating system (the software is available for Windows, Linux or Mac OSX).
Usage
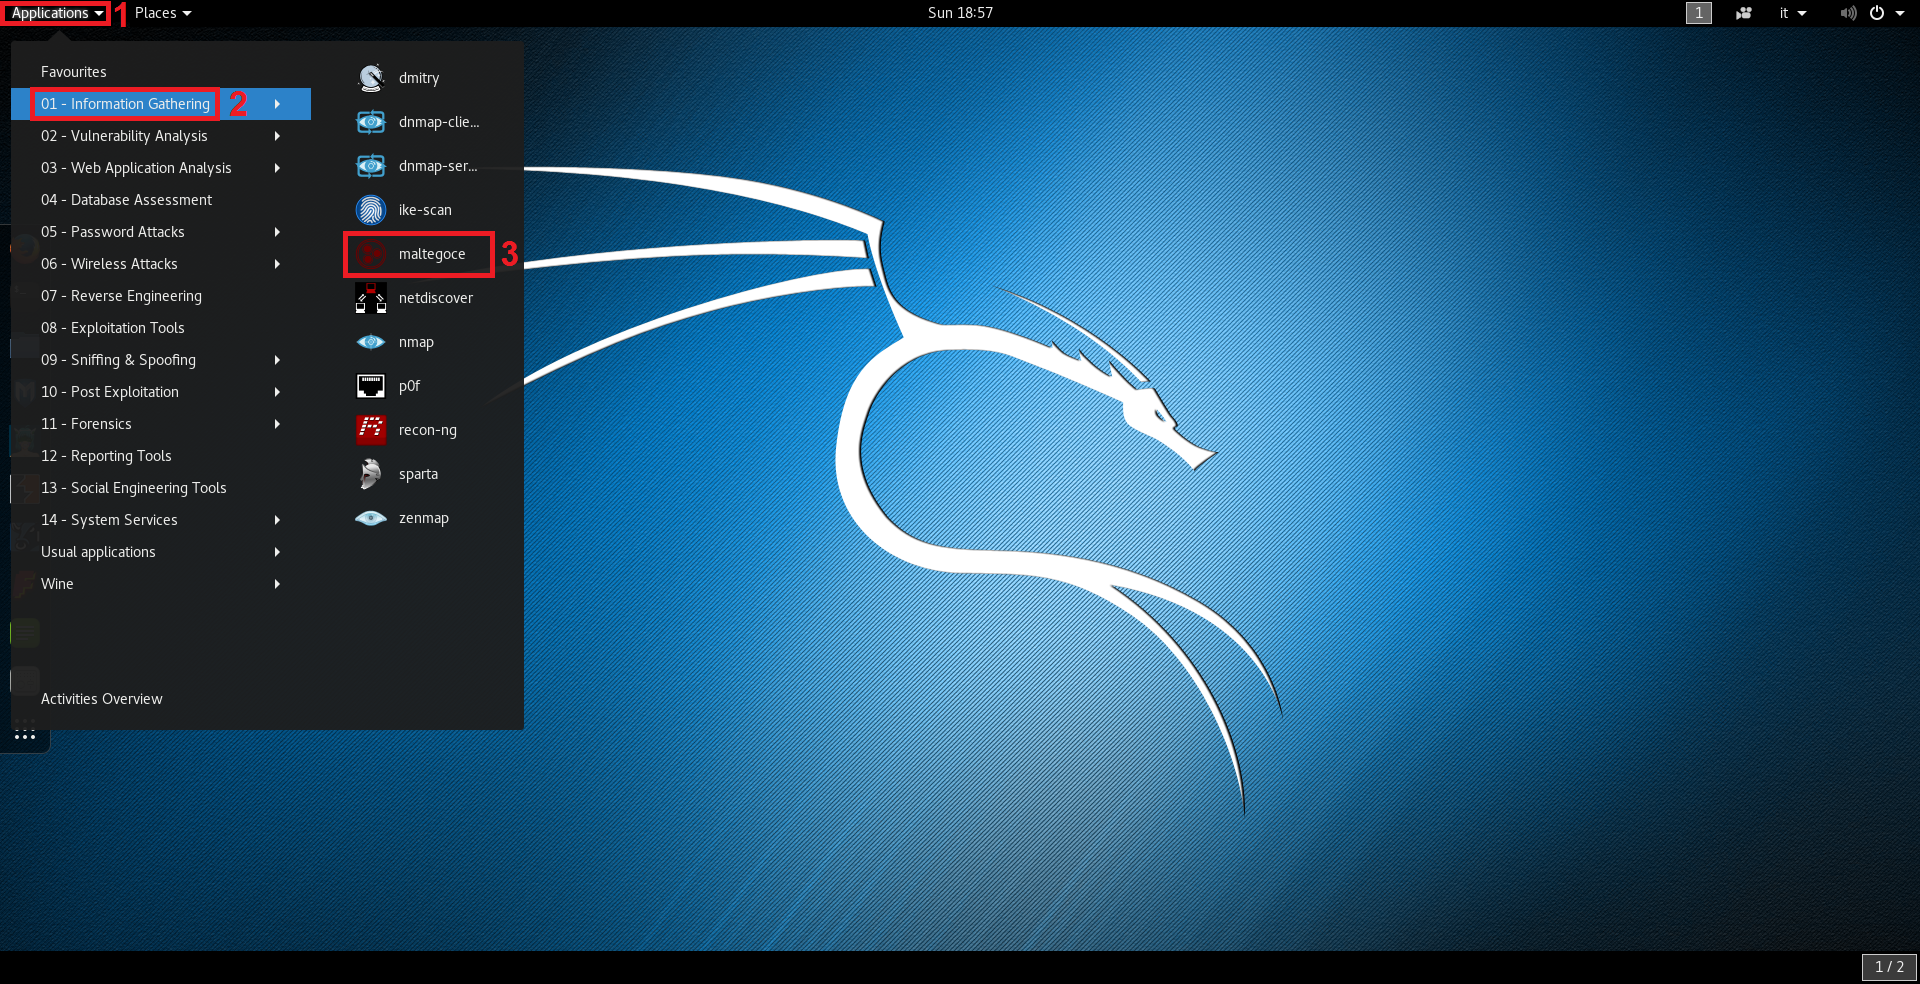
In Kali Linux, Maltego can be started by navigating in the applications menu by clicking on Applications > Information Gathering > maltegoce like shown in the following image:
Same thing can be done by clicking on the “Show application” menu:

Maltego can also be started by opening the Terminal and typing maltegoce, but since it is not a command line tool, this is not the best choice.
At the start up, after all the modules are correctly loaded, we get prompted with the Startup Wizard which asks for Maltego account credentials:
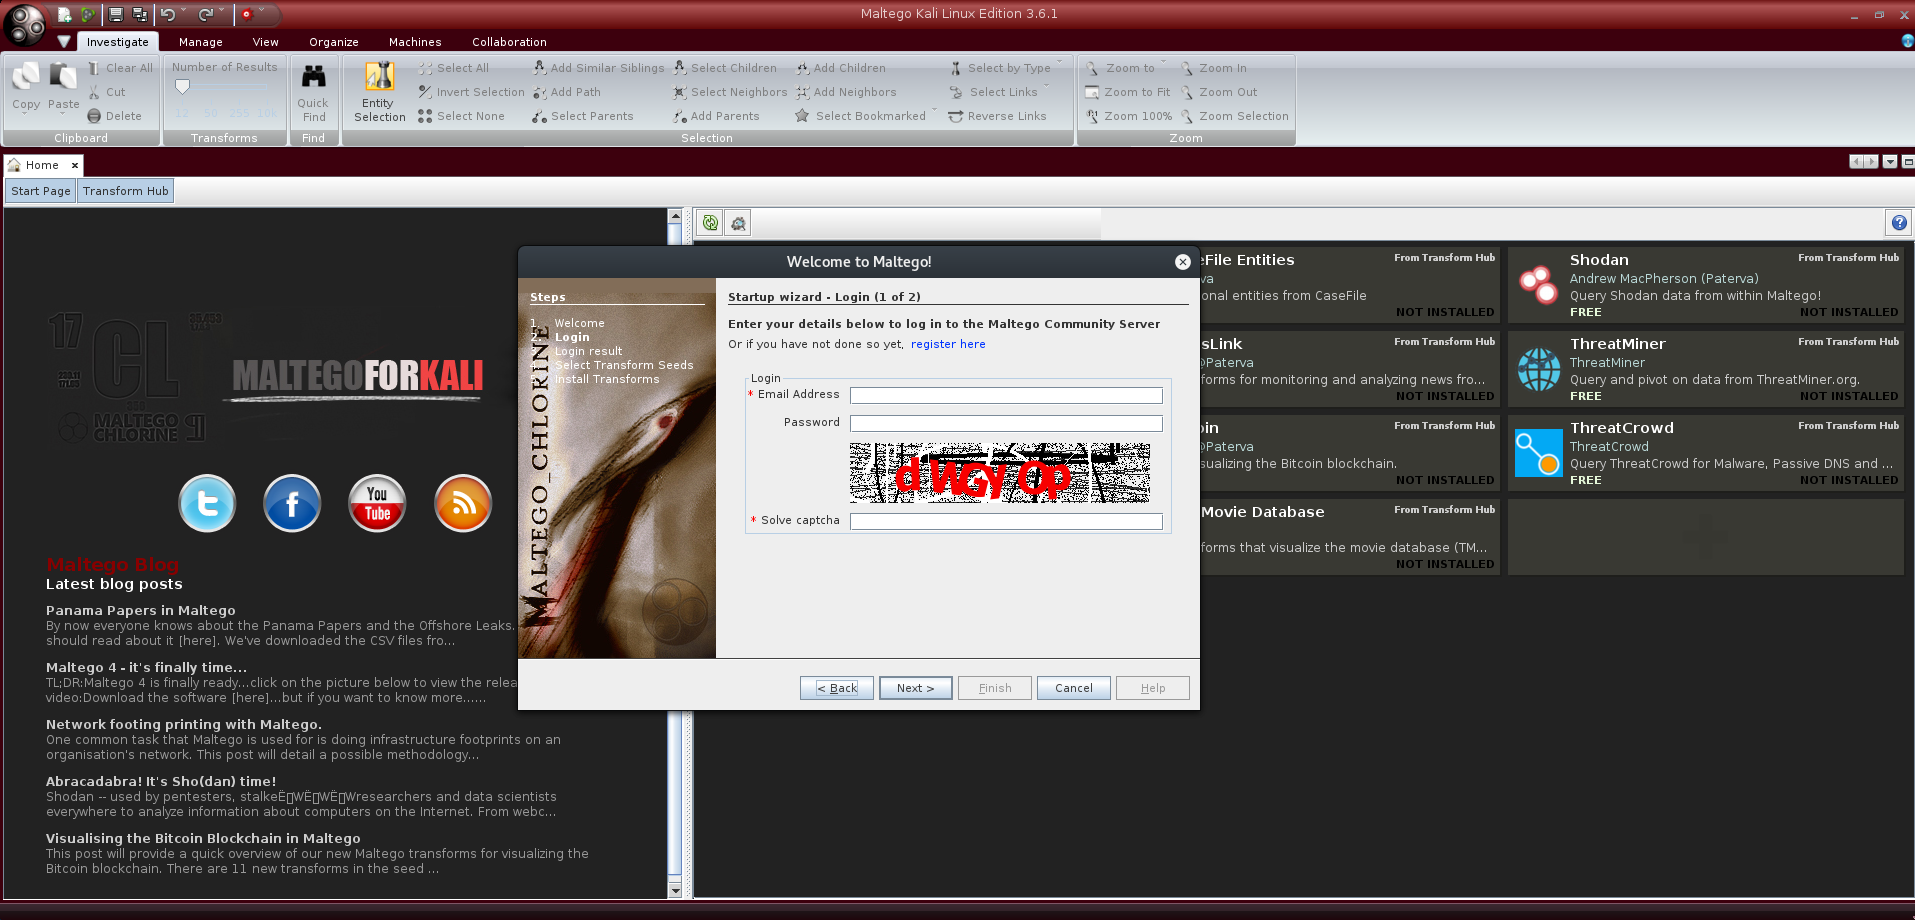
If you have inserted them and correctly solved the captcha, you will get a welcome message and the information about the validity of the API key. At the next prompt just leave “Install Transforms from Maltego public servers” which will install the transforms on the client.
At the final screen we get the correct initialization message with different possibilities for starting to use Maltego:

“Run a machine” allows you to run predefined searches, called “machines”: for example, the “Company Stalker” machine gets all email addresses it can find on the web for a certain domain and look for related account on social networks; it also gets documents and extract metadata from them.
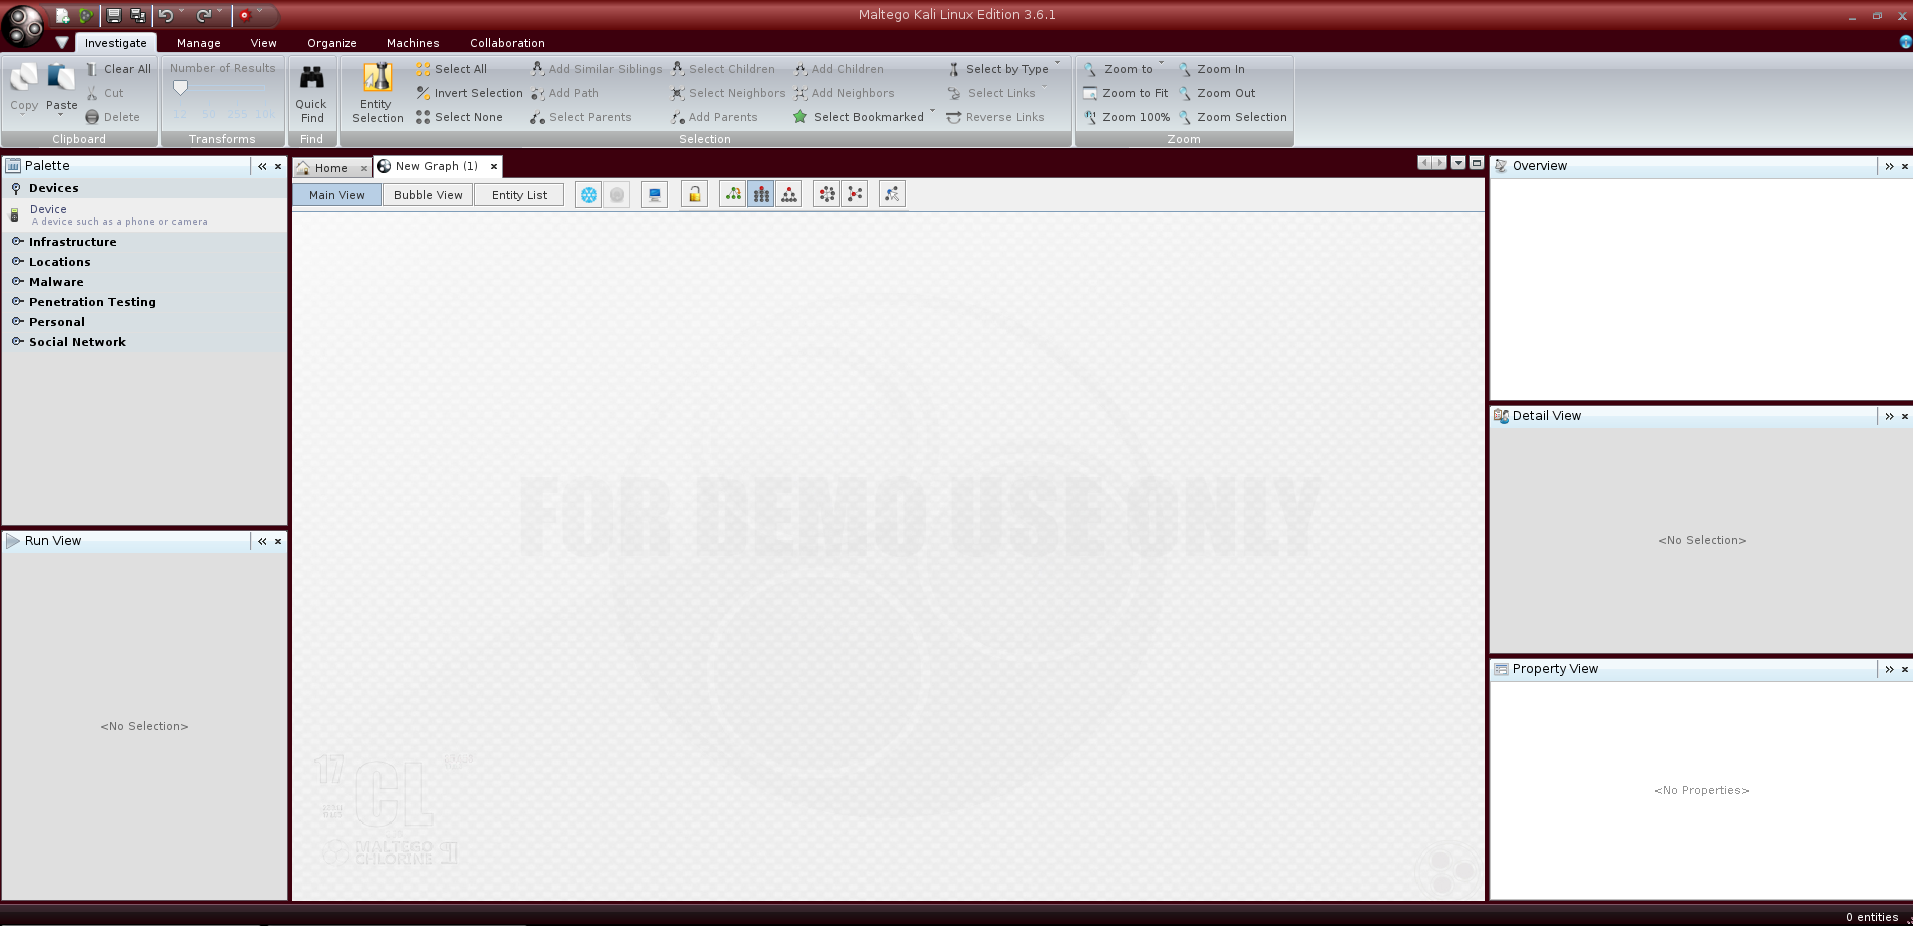
Since we want to perform a custom search we need to select “Open a blank graph and let me play around” and then click on “Finish”. This action opens a new empty graph where we can start a new OSINT activity:
We could have also opened a new graph by simply clicking on Maltego icon on the top left choosing “New”.
As the image shows, on the top part we have six tabs:
- Investigate - offers options to quickly search through the graph or to select entities;
- Manage - allows to import/export configurations, manage entities and transforms;
- View - allows to choose which panels are active;
- Organize - sets the node layout mode and the alignment type;
- Machines - allows to run, stop, create and manage machines;
- Collaboration - offers options to share projects and results.
There is a big central window which is where the graph will be developed and on the tab it is reported the name of the graph (you can save the project and give it a proper name).
On the left side we have the “Palette” panel which contains the following categories:
- Devices - adds a node such as a phone or camera;
- Infrastructure - adds a node such as a domain, MX record or Website;
- Locations - adds a node such as a GPS coordinate or location name;
- Malware - adds a node as hash entity;
- Penetration Testing - adds a node which identifies a technology;
- Personal - adds a node such as a document, email address or person name;
- Social Network - adds a node related to social networks like Facebook or Twitter.
Each of them contains objects related to that category: these items can be dragged on the graph and, once placed there, it is possible to use them as starting point for a search activity. This can be done thanks to the application of transforms.
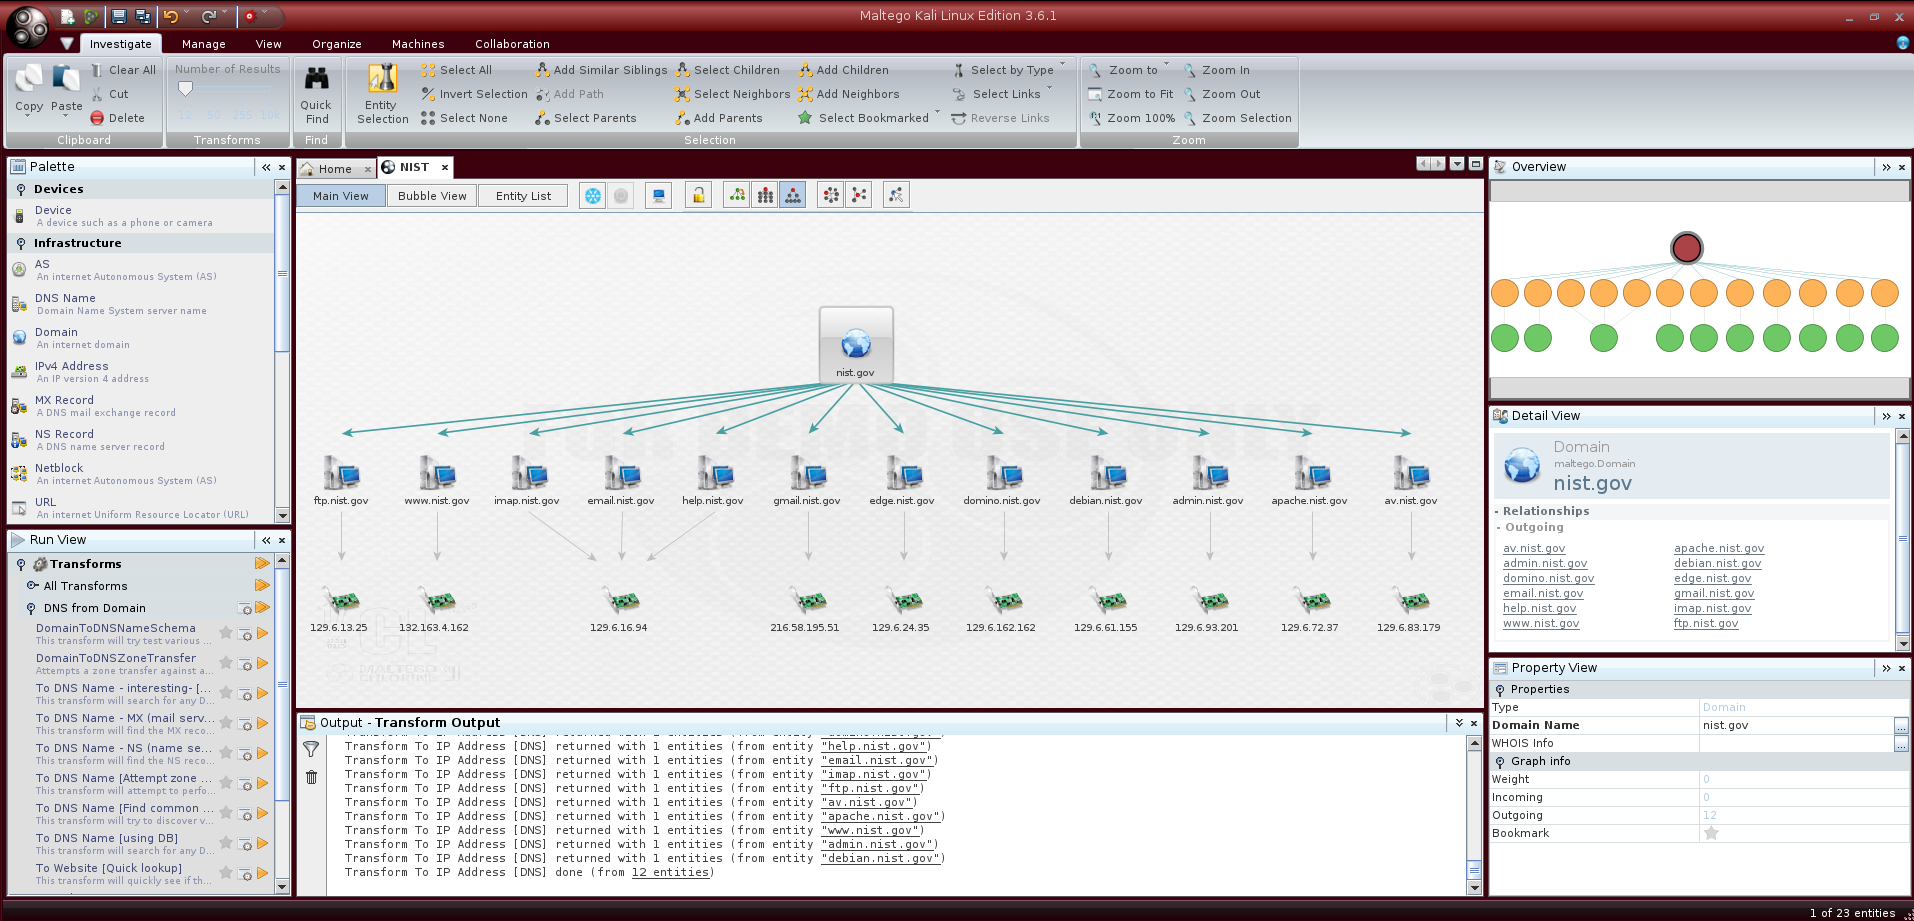
As done in the previous Information Gathering posts, we can use as target the National Institute of Standards and Technology (NIST). We can start by clicking on “Infrastructure” and dragging on the graph a “Domain” object; by double clicking on it we can change its name into “nist.gov”:

Now informations are displayed also in the other four panels:
- Run View - contains Transforms and Machines that it is possible to run against the selected object;
- Overview - shows a schematic graph where nodes are represented by colored circles;
- Detail View - displays informations about the selected object;
- Property View - shows properties regarding the selected object.
To run a transform on the object we can either access them through the “Run View” panel or by simply clicking on the object with the right mouse button. “All Transforms” contains all the possible transforms we can apply to that object type, which in this case is a Domain object.
The same transforms can also be found by looking inside the following four groups (of course they vary depending on the object type):
- DNS from Domain;
- Domain owner detail;
- Email addresses from Domain;
- Files and Documents from Domain.
![]()
We can start by running the transform DNS from Domain > DomainToDNSNameSchema which tries various name schema’s against the object domain; once the disclaimer is accepted, we can run the transform:
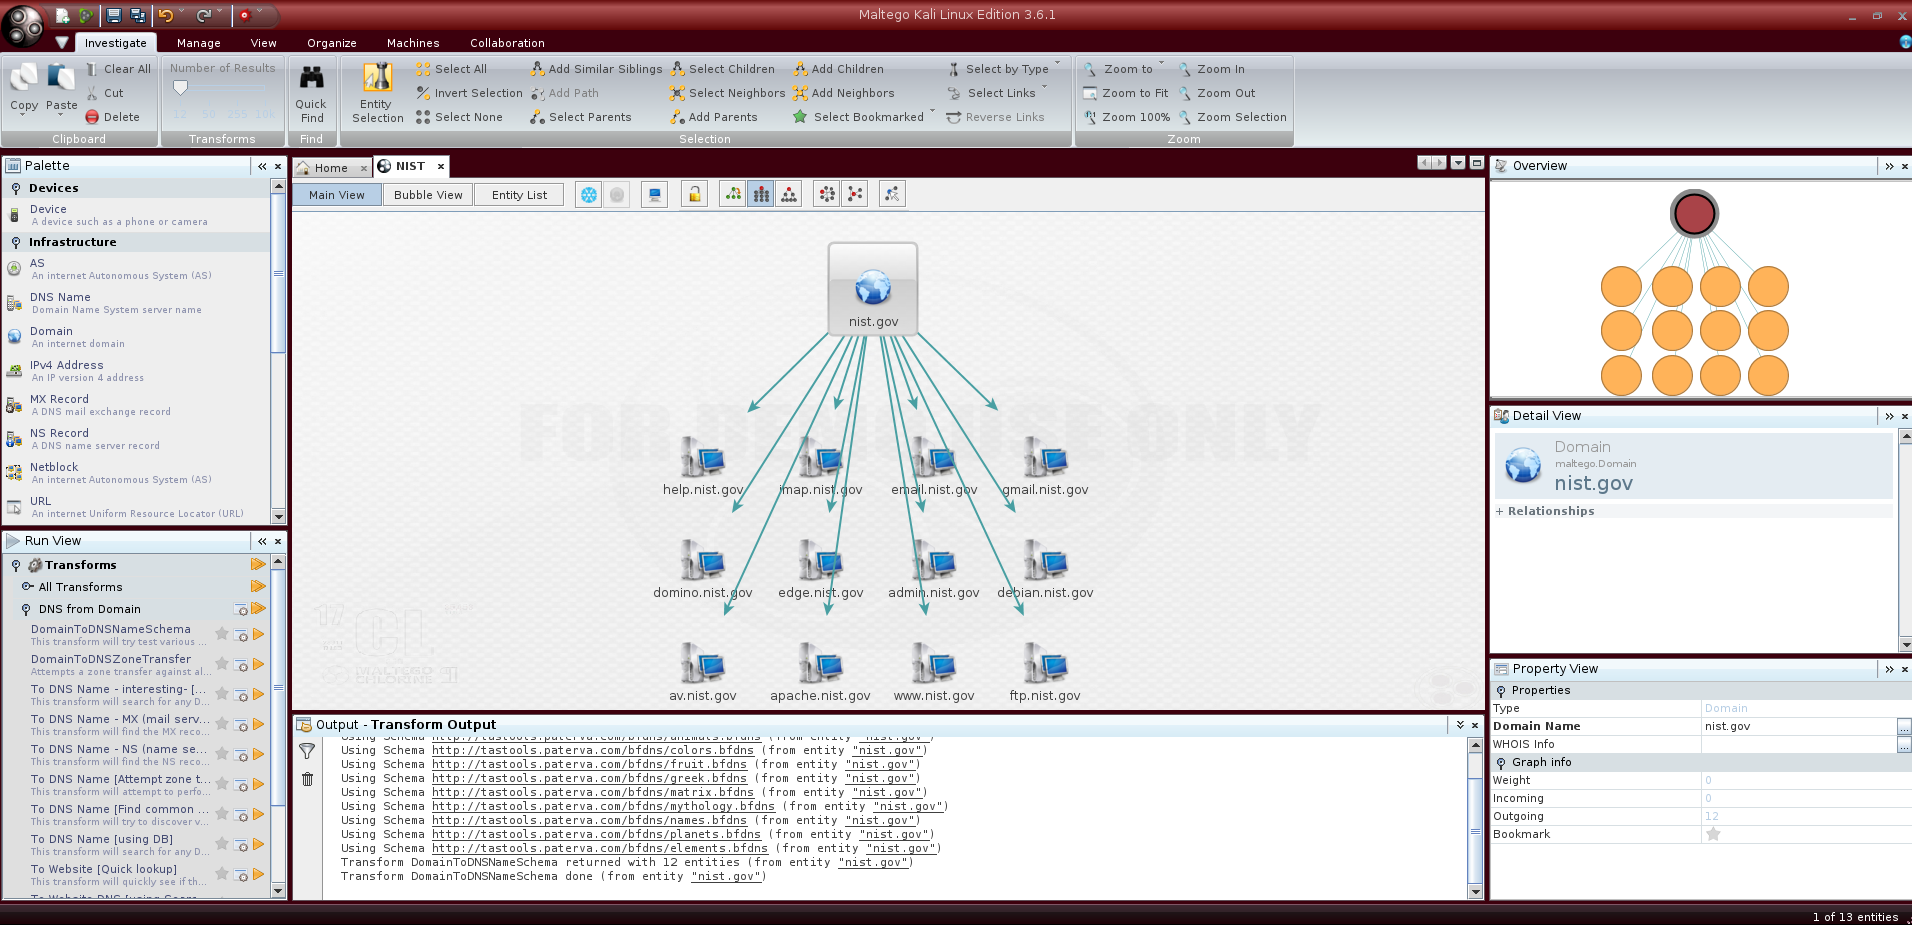
The execution of the transform can be verified in the “Output - Transform Output” panel: as reported, the tool searches for subdomains using lists of common names which are loaded on Paterva servers as files with extension “.bfdns”.
We can see that the graph is populated with subdomains found by the search; it is possible to switch from the Main View to the Bubble View or to the Entity List by simply clicking on the respective buttons on the top of the graph.
There is also the chance to change the layout mode by clicking on the icons on the upper part of the graph window; the default one is called “Block”.
Note that entities belonging to the same category are represented by circles of the same color in the Overview panel.
Suppose we want to find the IP address for a certain subdomain, then we right click on the object and run Resolve to IP; we can even select multiple objects using the “Shift” button and apply the transform to all of them:
Once we have the IP addresses we can run a further transform that returns the geolocation for that IP; just right click on the object, then IP owner detail > toLocation and run it by clicking on the yellow arrow:

The transform group “IP owner detail” is also really useful to find informations like email addresses, entities (person names) and phone numbers, so it is a good idea to take a look at the others transforms inside it.
Now suppose we want to check, in a passive way, which websites are associated to the target domain: DNS from Domain > To Website DNS [using Search Engines] is the transform we want to use. We can also choose which search engine we want to launch the query against (default is Bing); this can be done by clicking on the “Configure” icon near the yellow arrow key:
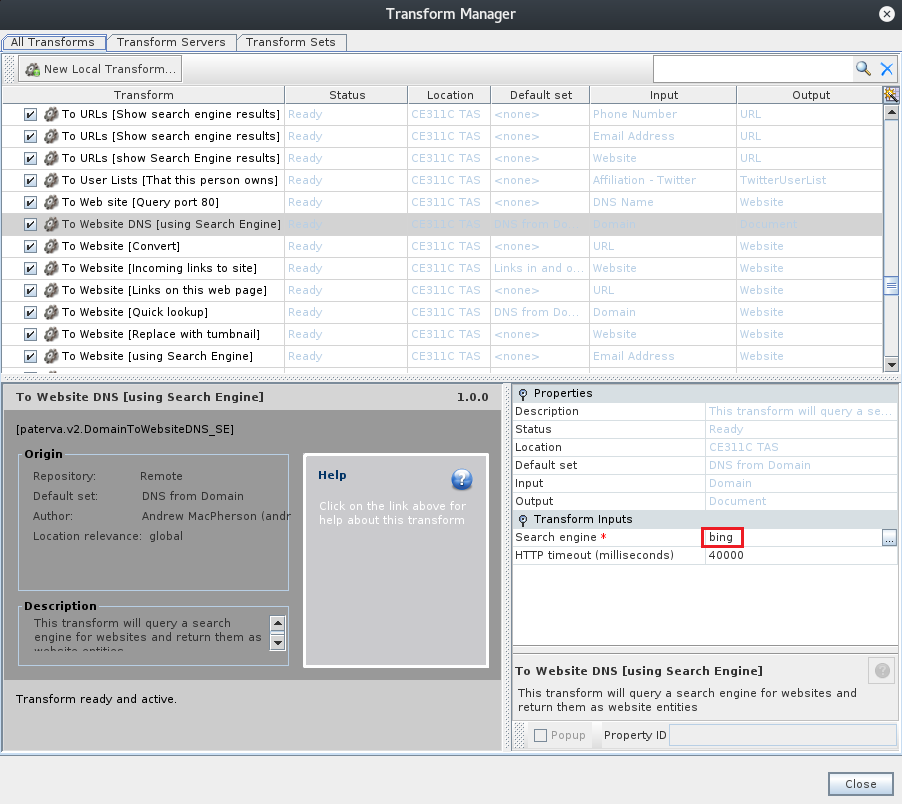
In this configuration menu there are also reported all the other transforms loaded in Maltego with their Status, Transform Server Location, Default Set, Input and Output informations.
Keep in mind that some transforms are more invasive than others: for example, it is possible to discover websites querying directly port 80 using the transform To Web site [Query port 80].
This is the resulting graph with a focus on the websites:
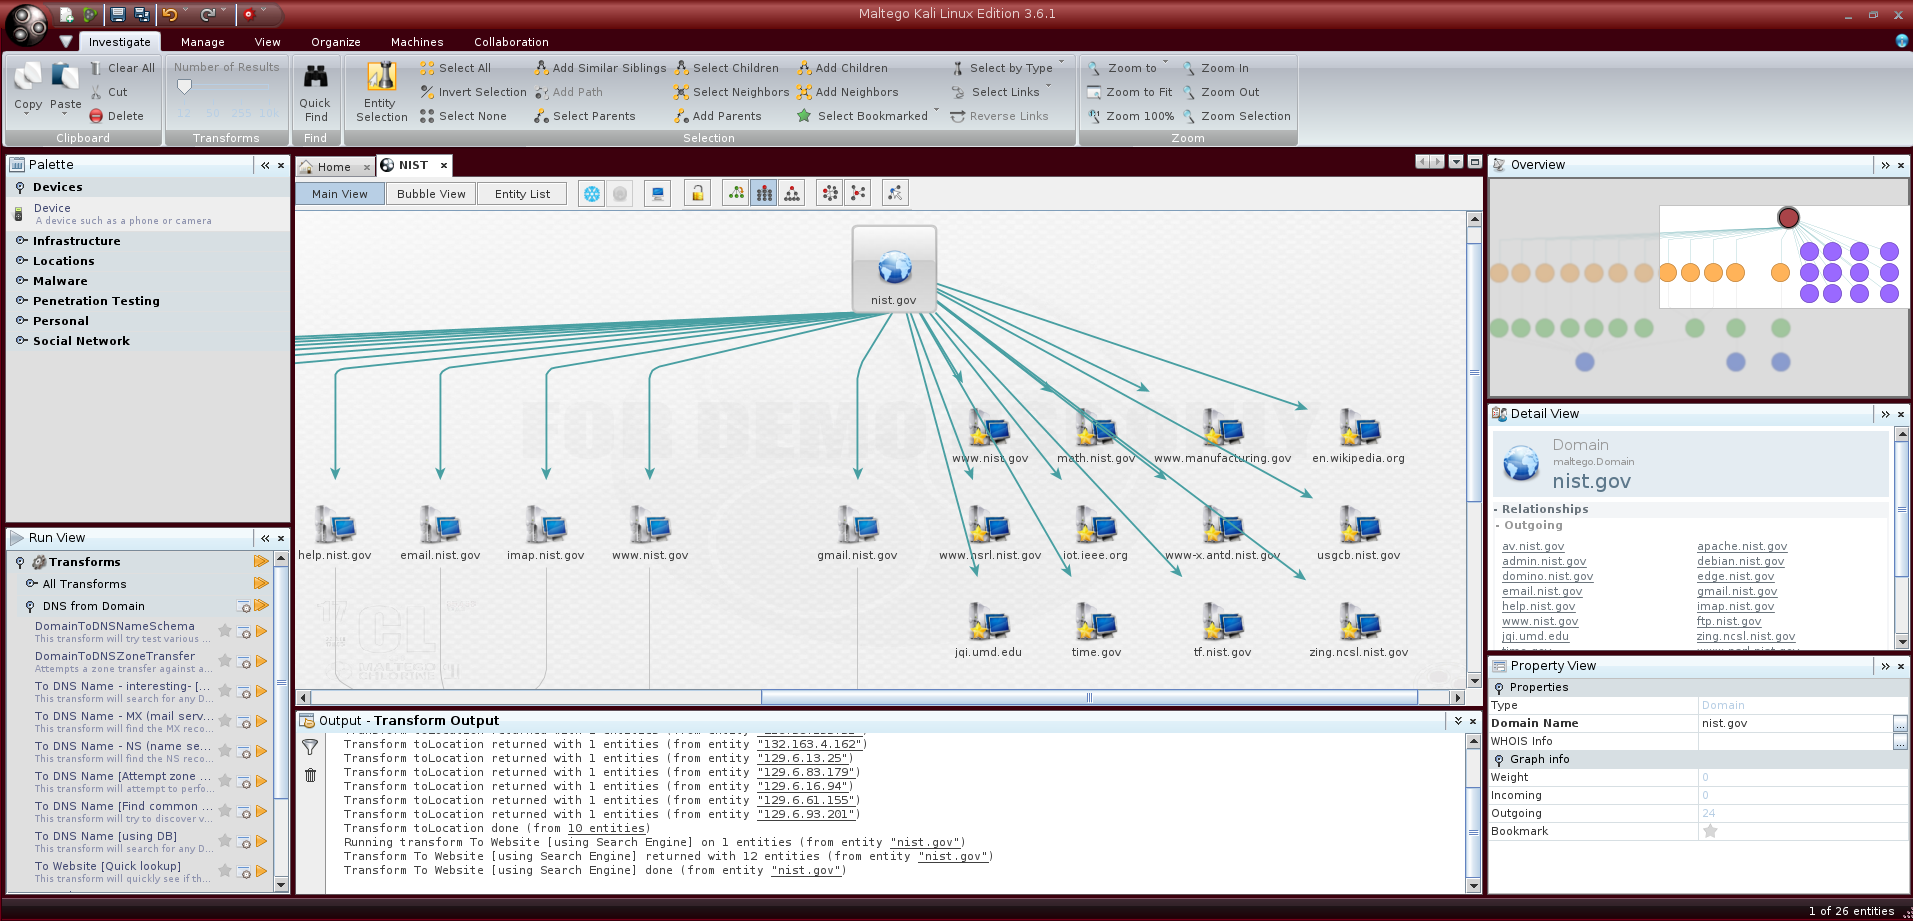
Note how Maltego automatically organizes nodes on the graph.
A really useful transform which can be applied to Website objects is ToServerTechnologiesWebsite; using the BuiltWith.com API it is able to retrieve informations about the technologies running on the target website:
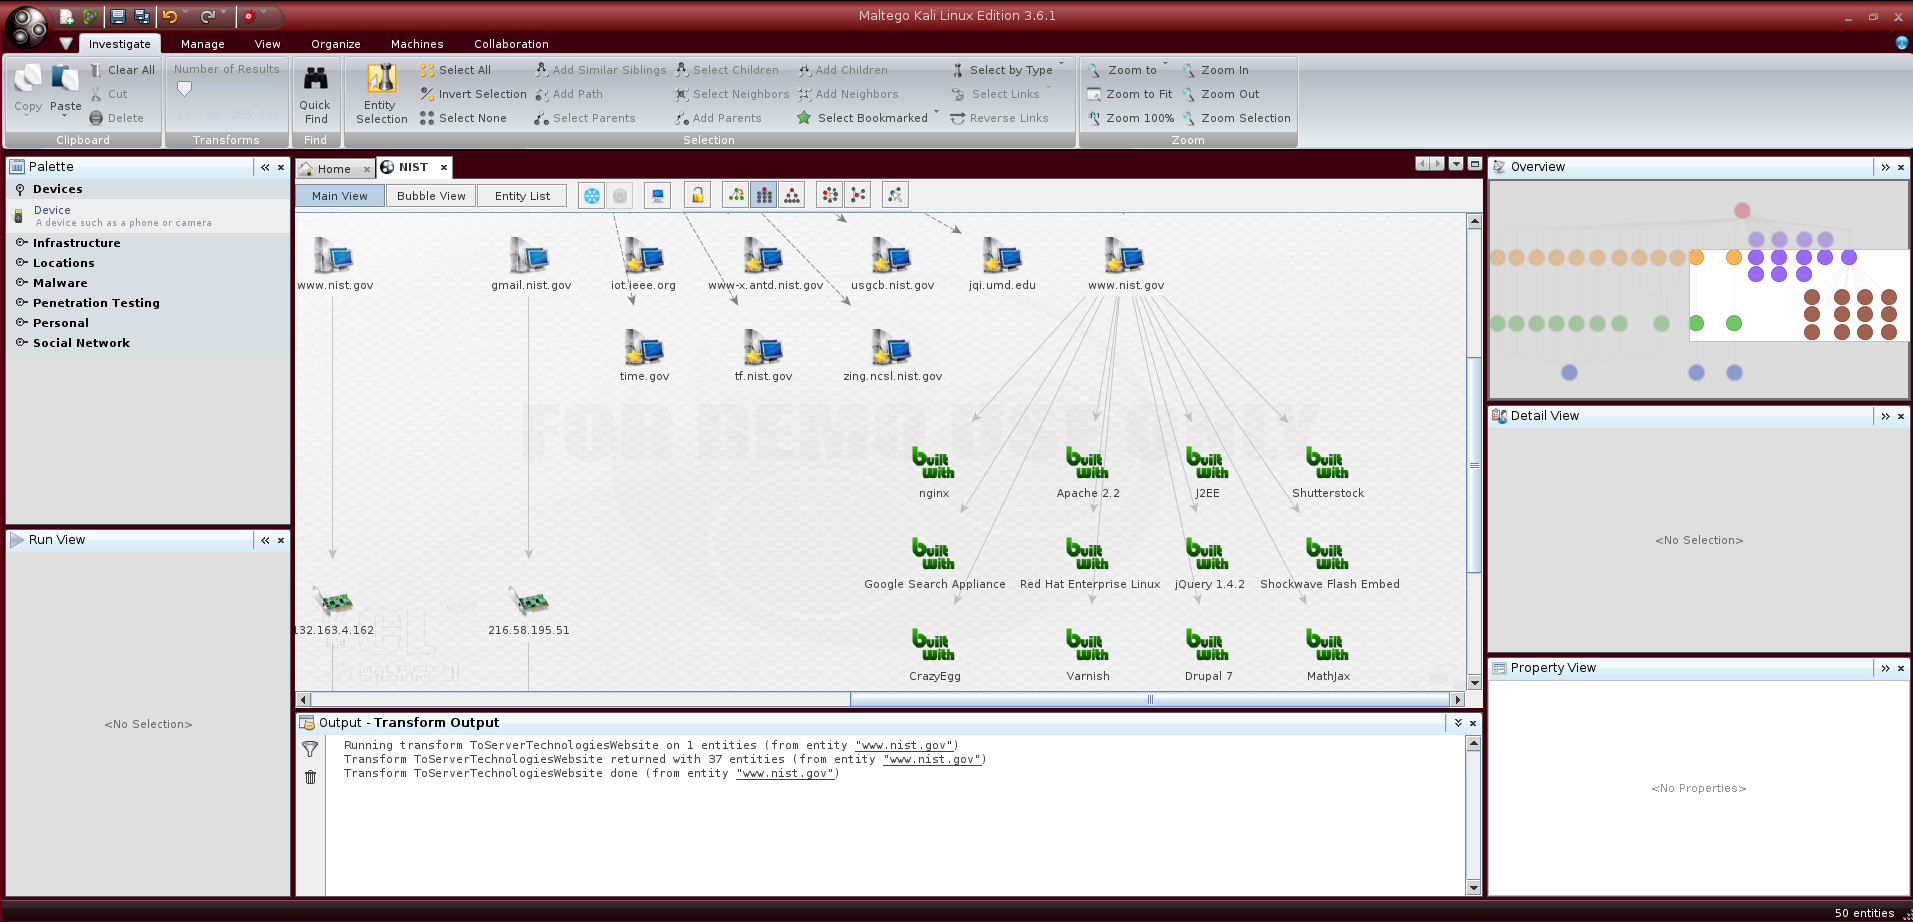
If you think the graph is becoming heavy, it is possible to remove unwanted nodes by selecting them and pressing the “Canc” button.
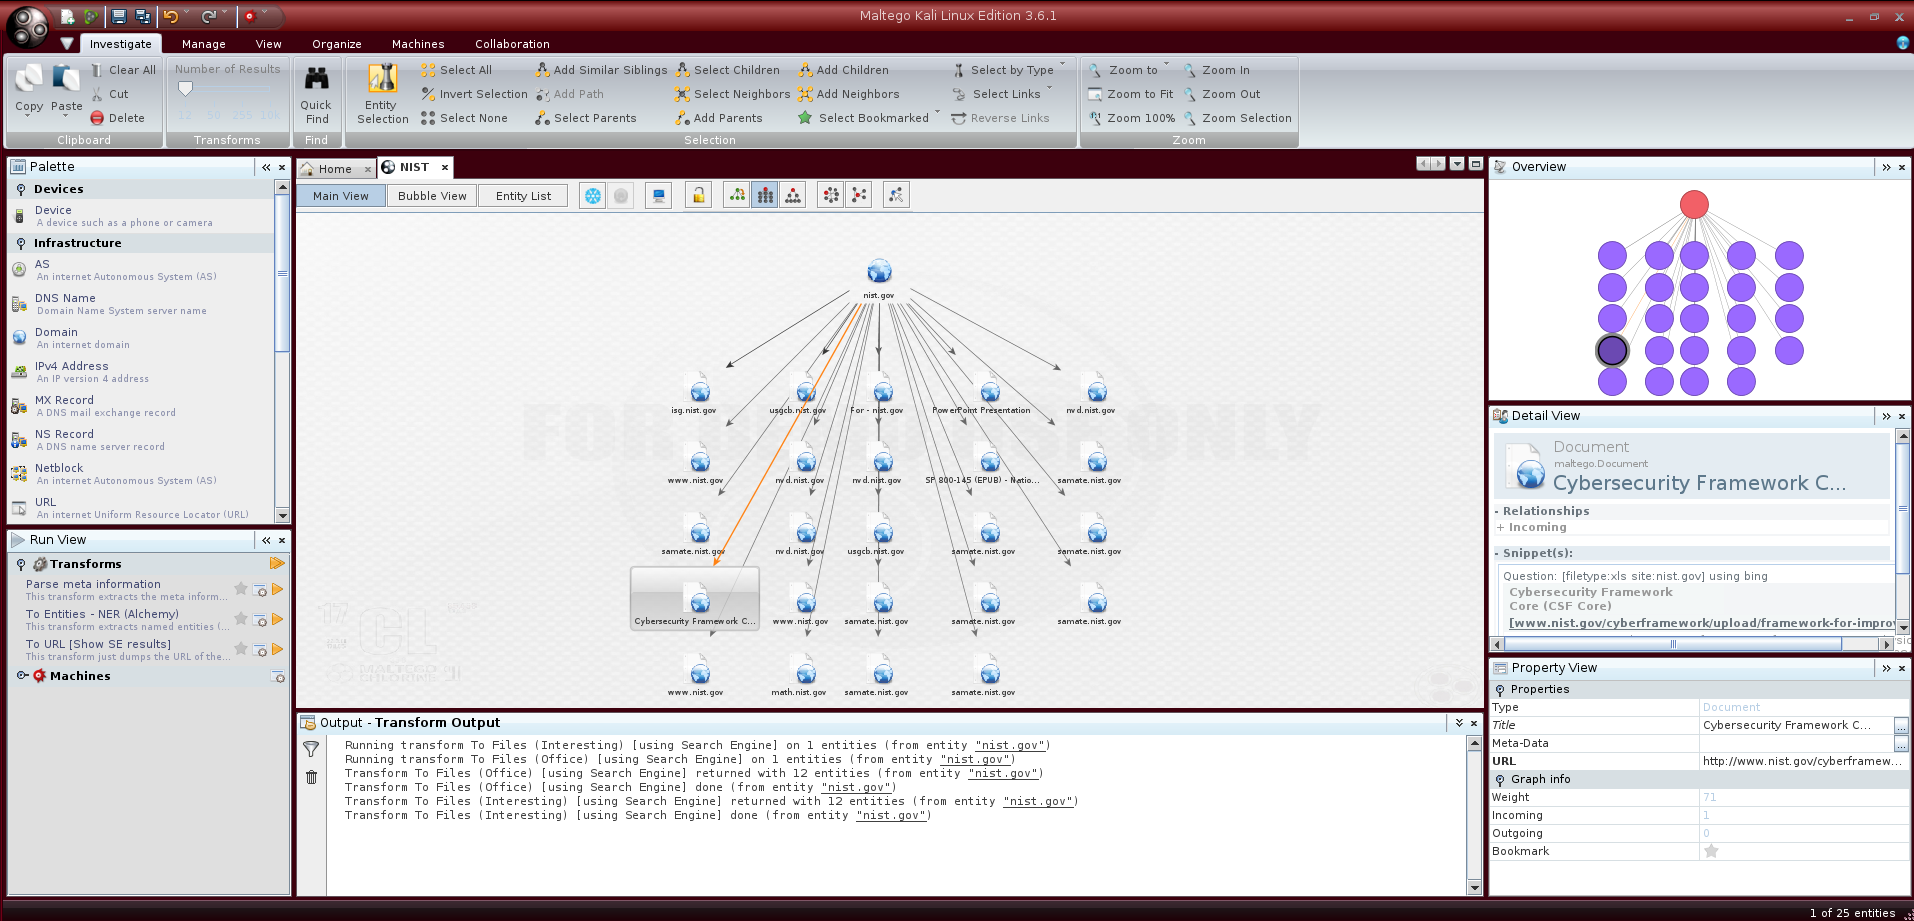
Another interesting transform is the one named Files and Documents from Domain: this will search for files and documents inside the given domain with the extensions reported in the configuration menu; by clicking on the node representing a file we can get informations about the query used to find it with the document download link.
The following step could be to find email addresses related to the target domain by using Email addresses from Domain transform on the “Domain” object; then we could run To Person transform on the “Email” object to get person identity related to that email address or To Phone number [using Search Engine] transform to try a phone number discovery.
Like seen before, another way to proceed is to use predefined search machines which are configured to run with a more or less invasive approach against the target; be aware that you can create your own machine so as to exactly perform the queries you need and nothing more.
You can even create your own transforms: http://dev.paterva.com/developer/getting_started/building_your_own_tds_transform.php.
Conclusions
Maltego is a powerful graphical tool for OSINT and it can be customized depending on your own needs. Since it generates graphs it gives a rapid overview of the target structure, differently from command line tools. This is why it is always important to work with more than one tool so as to have a better picture of the target.
As always, experiment with the transforms by yourself (there is a very good amount of them) to make the most of Maltego potential.